Best science kits for 13 year olds – MEL Science Kit review
*Mel Science provided us with a Mel Chemistry kit with experiments and MEL Kids kit for free to write this review, but all thoughts and opinions are 100% our own.
*All links marked with a ‘*’ are affiliate links which means I may earn a small commission on qualifying purchases
Lockdown brought a lot of kids indoors and onto the screens, with parents finding little time to entertain their kids because of the multitude of tasks we are faced with ourselves. If you follow 365 Days of No Screens you know I’m a huge advocate of finding hands-on activities for kids that get them off the screens and the MEL Science subscription service is one of the best science kits for 13 year olds to tackle negative screen time with their MEL Chemistry and MEL Kids subscription kits.
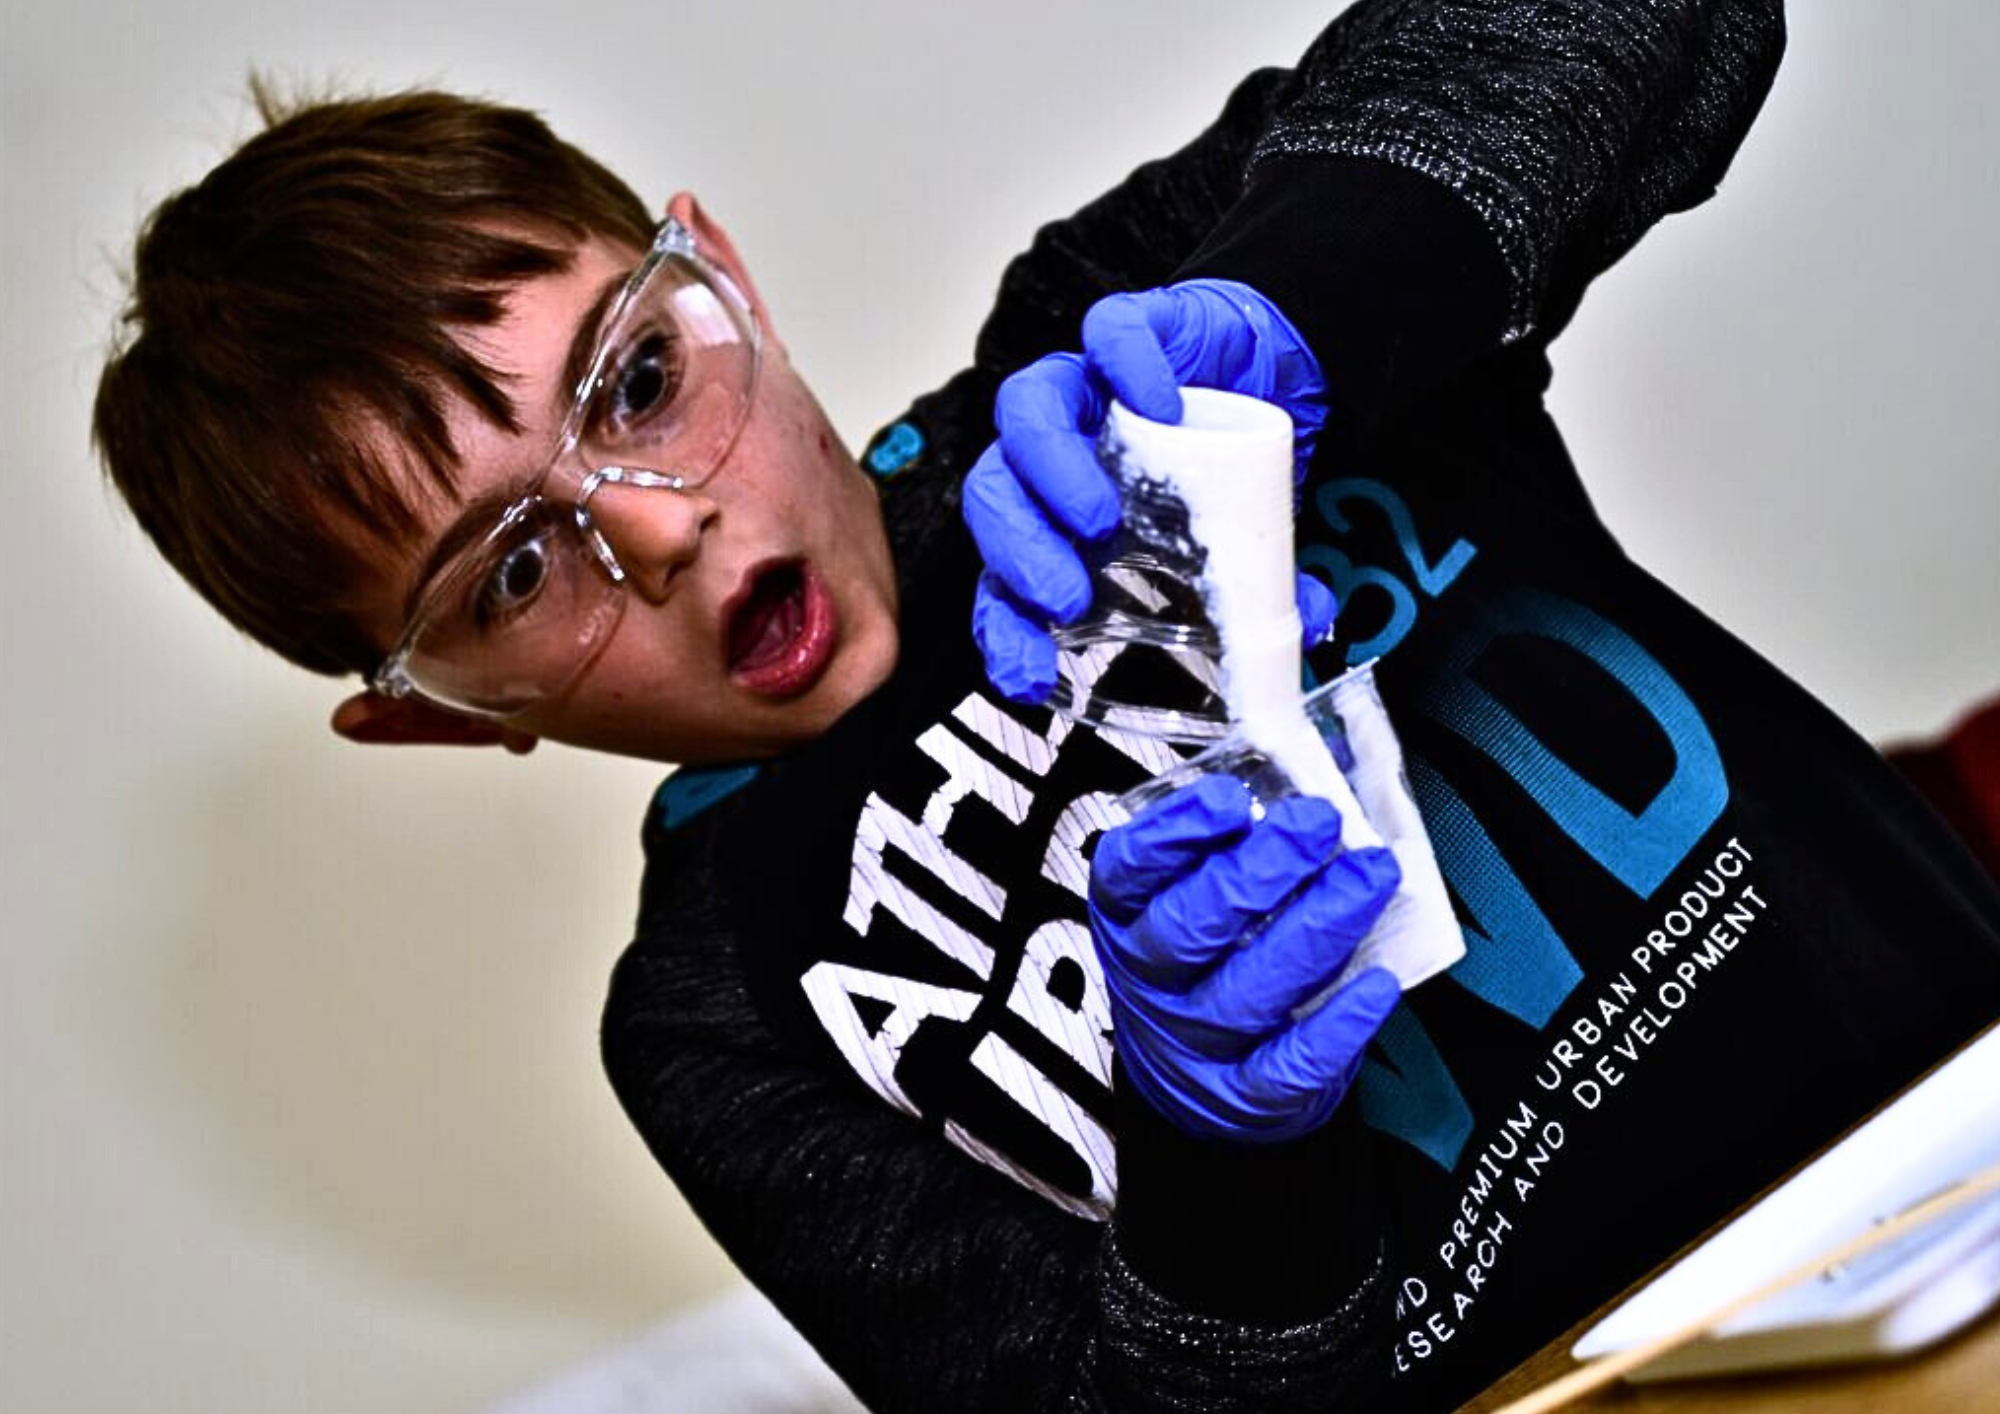
This article takes a deep dive into MEL Science’s MEL Chemistry subscription box not just for teens, but for kids ten years and over where we reviewed three of their earth science experiment kits with my then nine-year-old boy. He’s a little under the MEL Science age group for the MEL Chemistry subscription but he’s a science fanatic so he had no problems getting stuck in.
So let’s get started!

Pin image
| Overall rating |  |
| Ease of use |  |
| Fits the purpose |  |
| Educational toys | |
| Suitable for children | |
| Value for money | |
| Children’s enjoyment rating | |
Subscribe to MEL Chemistry and save up to 3 months free with prepaid plans now!*
The MEL Chemistry experiments we worked on
We are reviewing the high quality MEL Science Subscription Package which includes the MEL Chemistry experiments, Tin, Diffusion and Artificial Sea as part of MEL Science’s MEL Chemistry subscription for kids aged ten years and up.
What is chemistry and why do we need to study science?
Chemistry is an ancient and very interesting natural science that helps us to understand the world more deeply. Chemistry improves the lives of millions of people globally with life-saving medicines, plastics, sophisticated scientific and industrial equipment and stainless steel, which all owe their existence to chemistry.
Chemistry is an exciting science with chemical reactions taking place in front of your eyes. When you cook ingredients to eat, the stomach acid in your body when you digest that food, and when you boil a kettle and watch the water convert to steam, these processes all involve chemical reactions.
Chemistry helps you learn more about these everyday reactions and provides you with an opportunity to visit the world of molecules and atoms, which make everything in the universe look the way we see it.
What is MEL Science?
MEL Science is a London-based company of experienced educators and scientists who created a VR-powered subscription service in 2015 for safe chemistry experiments aimed at kids who are ten years plus. The MEL Science kits are delivered to 63 countries and have even garnered attention from the Royal Society of Chemistry, Science magazine and the Wall Street Journal, among others.
MEL Science tackles negative screen time by providing kids with more educational and effective use of their time on the screens, so the science kits are equipped with VR and AR respectively in an effort to not only win back positive screen time but to further increase the efficiency of hands-on learning.
Get hands-on experiments, VR lessons, and live chemistry classes with science teachers in one subscription.
What are the MEL Science kits?
The types of MEL Science kits you get are dependent on the age of your child (although children of all ages can enjoy both lab kits.)
MEL Kids is directed towards kids aged five to ten years and offers early science and AR to boost their enjoyment of science from an early age.
MEL Chemistry is designed for kids aged from ten years old and offers safe chemistry and VR experiments to boost their knowledge of science and watch science come to life in the most fun way.
You also get a MEL Physics subscription which is a comprehensive science kit we will be looking at shortly.
A little about MEL Chemistry kits from MEL Science
MEL Chemistry kits are hands-on experiments, VR lessons and live chemistry classes with science teachers in one subscription, delivered to your door every month.
You get two to three fun experiments per month and they are completely safe and designed for home use.
With these chemistry kits, your child from ten years and up (my nine-year-old reviewed these kits and was more than capable) can become a budding young scientist in the comfort of their own home – plus it’s a great bonding experience for the whole family too.
The best science kits for 13 year olds. What do MEL Science Subscription boxes offer?
Scientists with 10 PhDs in science and who are also parents have expertly built these experiments, so they know what they’re doing and who they’re doing it for.
MEL Chemistry kits use innovative technology like Virtual Reality to bring learning science to a whole new level of understanding. VR lessons cover all the basic topics covered in a standard school curriculum.
The child’s STEM education disguised as entertainment – when a child creates these experiments they’re creating science and the results are captivating which encourages them to learn more in such a fun way. Research conducted by the New Jersey Institute of Technology shows that kids who took part in these MEL Chemistry sessions achieved higher scores in exams.
Each kit thoroughly complies with European safety regulations (EN 7104) which meets the strictest standards, making them completely safe for home use. This is the perfect science kit for future engineers of all skill levels who want to learn more about science and have their own classroom laboratory at home!
Subscribe to MEL Chemistry and save up to 3 months free with prepaid plans now!*
What was inside our MEL Chemistry Science kit?

You get:
- Starter Kit and VR headset with your first box
- 2 – 3 experiments every month
The MEL Science Starter Kit
The Starter Kit contains reusable equipment to conduct your experiments, including accessories for your smartphone/tablet to help you learn chemistry more effectively. You get eight home science tools valued at over £50, which are:

1. Starter Kit Manual of detailed instructions
This is a detailed manual of instructions
2. Safety glasses x 2
The Starter Kit includes two pairs of safety glasses to ensure safety of the child and the adult.
3. Plastic beaker 250ml (not for heating)
4. Glass beaker 150ml and Glass flask 100ml(for heating)
The Borosilicate glass beaker and flask withstands excessive heat and is great for heating liquids on a stove. It conducts heat well and is crack-resistant.
The flask and beaker will be necessary for experiments that require you to heat reagents.
5. Rubber stoppers x 3
6. Funnel
7. Small funnel
8. Pocket stove and flame diffuser
This foldable stove can be used safely to conduct experiments that require an open flame.
9. Cork hot pot stand
10. Plastic Tray
The Starter kit has a plastic white tray to protect your table from possible spills and stains.
11. Disposable cups x 45
12. Smartphone clip-on macro lens
Magnify the chemical reactions like a magnifying glass with the macro lens which can turn almost any smartphone or tablet into a microscope so you can capture the amazing pictures and videos of your experiments
13. Smartphone/tablet stand
All experiments included in the MEL Chemistry sets are accompanied by video instructions which contain detailed descriptions and exciting assignments.
Every time you conduct an experiment you can set up your smartphone/tablet in front of you and launch the safe MEL Chemistry app to start your guided journey through the experiment and chemistry.
The stand is also useful for taking images and videos of your experiments by providing support and a proper angle for shooting the video.
Subscribe to MEL Chemistry and save up to 3 months free with prepaid plans now!*
How to use MEL Chemistry VR (Virtual Reality) Headset

There are dozens of VR lessons and tests spanning a standard school chemistry curriculum and with the subscription you’ll get over 33 different VR lessons.
The Molecular Viewer uses a virtual reality headset inspired by Google Cardboard. Just insert your smartphone to get started!
The MEL Chemistry app allows you to explore molecules and crystal lattices. With the Molecular Viewer, you will even be able to immerse yourself into any given substance and explore its structure from the inside.
In addition to the MEL Chemistry app, you can use the Viewer for hundreds of third-party applications including games and 3D maps.
Turn your smartphone into a portal to virtual reality!
MEL Science
Here are some examples of VR lessons you can access in the subscription:
Atoms in solids
Atom size trends
Interactive periodic table
Chemistry sets
You will receive one experiment set each month which includes two to three experiments and all the equipment you’ll need to conduct the experiment; enough chemical reagents for two attempts, additional components and visual step-by-step instructions.
In your first month, you will receive the Tin experiment which we have reviewed below. This includes the Tin Dendrite and Tin Hedgehog experiments. Check out the full review of these two experiments below.
Live lessons with science teachers
Every week scientist teachers will give lessons based on the MEL Science experiment kits. Check the timetable and join the lessons so you can learn more about the science behind the experiments. You can also chat to other subscribers around the world.
Subscribe now to get your Starter Kit and MEL Chemistry set now!*
How much is the MEL Chemistry subscription package and where can you buy it?
So how much does MEL Science cost?
You can pay monthly which costs £29.90 a month or you can subscribe to prepaid plans which include:
- 12-month subscription which costs £269.10 and you get three months free – that’s a saving of £89.70
- 9-month subscription which costs £239.20 and you get one month free – that’s a saving of £29.90
You can also gift a subscription where you and the child’s parents will receive a customised certificate with the child’s name when the transaction is completed. You can print out the certificate or share it with the child whenever you like. These kids make great gifts for birthdays!
More information on subscriptions here*
How long will it take to be delivered?
Your first package will arrive within two weeks of registration. Subsequent monthly kits will be delivered within two weeks of each monthly charge. You can cancel, pause or resume your subscription at any time.
MEL Chemistry mobile app


You can explore chemistry in more depth with the mobile app to see how the molecules of the substance you are working looks like in 3D. Use the VR headset supplied with the mobile app to see these chemistry experiments come to life!
The experiments we reviewed
- Tin – Tin Dendrite and Tin Hedgehog
- Diffusion – Chemical Reefs, Detective Iodine, and Diffusion Through Plastics
- Artificial Sea – Calcium Silicate, Chemical Seaweed and Chemical Jellyfish
Before you start!
How to act in the chemistry laboratory
Your workplace
The desk you work at will be your chemical lab table, so it’s important to adhere to the following rules:
- Keep other food and drinks away from the lab table
- Work carefully and do not rush
- Make sure an adult is supervising your child. Even trained chemists do not work alone
- Clean your lab table thoroughly after every experiment
Instructions
Review the instructions and the safety equipment before you start so you know what you’ll be working with. Review all the general safety requirements, as each experiment has its own safety guidelines.
Chemicals
The chemicals supplied in the kits are not harmful if used within the guidelines of the safety rules. You, as a chemist, should know all the properties of the chemicals you are using. Therefore, it’s very important to read the manual and safety rules on the reagent bottles. You can find more information about each compound at melscience.com.
Safety requirements
- Keep young children, animals and others who are not wearing eye protective glasses away from the chemical lab table
- Always wear the safety eye goggles provided
- Store the chemistry set away from children under ten years old
- Make sure all containers are fully closed and properly stored after use
- Ensure all empty containers are disposed of properly
- Wash hands thoroughly after each experiment
- Do not use any equipment which has not been supplied with the set or recommended in the instructions
- Do not eat or drink at the experimental table
- Do not allow chemicals to come into contact with your eyes or mouth
- Do not replace foodstuffs in the original container. Dispose of immediately.
The manual sets out first aid measures should there be an accident during the experiment. You can find the guidance on page 7 of the enclosed Starter Kit Manual.
Find your workplace to perform your experiments, grab your white tray, your protective gloves and your safety goggles and let’s get started!
Subscribe to MEL Chemistry and save up to 3 months free with prepaid plans now!*
First experiment – Tin

What was included in the box?
Tin Dendrite and Tin Hedgehog
Tin Dendrite

What is this experiment about?
A metal tree grows before your very eyes!
What was included in the box?

Reagents
Safety
- Put on protective gloves and eyewear
- Conduct the experiment on the plastic tray
- Always follow proper safety precautions when handling batteries
How to set up the experiment? What do you need?
- Prepare the tin chloride SnCl2 solution


- Pour one bottle of the NaHSO4 into SnCl2 solution


- Insert the tip securely


- Use the red cap
- Shake
- The solution will not coat the surface of the Petri dishes well.


- To make the liquid distribute evenly, we need to decrease its surface tension by adding some liquid soap

- Place the electrodes into the solution – the clips should touch the solution


- Connect electrodes to their source of electric current – the batteries
- Tin ions Sn2+ near the negatively charged electrode (the black one) will transform into metal tin Sn0. The tin will gradually form long dendrite-shaped crystals through the solution.

What were the results?
A wonderful dendrite grew from a colourless salt solution!


The science behind Tin Dendrite

Batteries are electron pumps that suck electrons in with their ‘+’ and pump them out from their ‘-‘. When a pump is connected to a solution via wires, chemical reactions take place by the ‘-‘ electrode. Some particles will capture the electrons pouring out, and by the ‘+’, some particles will give their electrons away.
Tin ions Sn2+ (i.e. tin atoms with two electrons missing) will accept some electrons at the ‘-‘ wire and will turn into metallic tin. Meanwhile, the ‘+’ electrode itself, which is made of iron, will give some of its electrons to the ‘+’ leaving some iron ions floating around. This is why the red crocodile clip will eventually dissolve if you don’t disconnect it.
Why does the tin dendrite grow?
By attaching the crocodile clips to the Petri dish, you are connecting the tin(II) chloride (SnCl2) solution to the batteries. Once connected, the electric current starts to flow through the solution. Near to one of the clips, a tin reduction takes place:
Sn2+(solution) + 2e–→ Sn(solid)
Tin is a metal that forms a solid, metal tin. The tin dendrite grows in the direction that the electric current flows through the solution, from one clip towards the other.
You can find out more about electrolysis and why you used SnCl2 to conduct the experiment here.
What did we think of the experiment?
Tin Dendrite is a fantastic experiment to start with. It’s very simple to conduct and the chemical reactions of watching the metal tree grow was fascinating for Aidan.
Subscribe to MEL Chemistry and get the Tin experiment with your Starter Kit now!*
Tin Hedgehog

What was included in the Tin Hedgehog experiment?


Reagents
What is this experiment about?

A zinc pellet turns into a hedgehog!
Safety
- Put on protective gloves and eyewear
- Conduct the experiment on the tray
- Do not put the cap on the vial
How to set up the experiment? What do you need?
- First, prepare the tin chloride SnCl2 solution by pouring one bottle NaHSO4 into SnCl2


- Insert the tip securely
- Use the red cap
- Shake
- Fill the solution halfway


- Grab your Zinc Zn pellet

- Now submerge a piece of a more active metal, Zinc Zn, in the tin salt solution and see what happens


What were the results?

The zinc pellet transforms into a prickly hedgehog!


The science behind the Tin Hedgehog experiment
Metals in their metallic form are made of positively charged particles, which are embedded in a negatively charged cloud of electrons. Particles of some metals like to live inside this cloud more so than others.
In this experiment, tin Sn would rather chill inside the cloud of electrons, whereas zinc Zn is more inclined to float around on its own as a charged particle or ion. When we place a zinc pellet in a solution containing tin ions Sn2+, the tin ions pull the electron blanket over, turning it into metallic tin and zinc ventures out into the solution.
The tin particles sit next to each other in a crystal structure which is why tin forms elegant needles and does not cover the zinc pellet evenly.
You can find out more about the science behind this experiment here.
How does the tin hedgehog form?
The zinc metal (Zn) reacts with the tin(II) chloride (SnCl2) present in the solution. The following reaction occurs:
SnCl2 + Zn → Sn + ZnCl2
During the reaction the tin precipitates from the solution as beautiful crystals. The tin crystals grow on a surface of the zinc pellets. That’s how the tin hedgehog appears.
What did we think of the experiment?
A fantastic first experiment to whet our nine-year-old’s appetite. He was particularly impressed by the Tin Hedgehog which transformed in front of his eyes and he loved the trail of tin dendrite that was left on the petri dish.
This experiment left Aidan wanting more and it was so easy to complete that it’s a great starter experiment to build confidence in science.
Subscribe to MEL Chemistry and get the Tin experiment with your Starter Kit now!*
Second experiment – Diffusion through plastics


What is this experiment about?
The experiment is finding out about whether iodine escapes the plastic packet
Reagents
Safety
- Once you’ve grated the potato, put on the protective gloves and eyewear. (Disclaimer: we lost our gloves when conducting this experiment so dad helped with some of the solutions)
- Conduct the experiment on the plastic tray
- Observe safety precautions when working with boiling water.
- Avoid inhaling iodine vapours from the packet.
How to set up the experiment? What do you need?

- Prepare a start solution. Potatoes are a great source of potassium.
- Starch hardly dissolves in cold water but will dissolve reluctantly in hot water.
- Starch reacts enthusiastically with iodine, and when it does it forms a dark blue compound. For this reason, starch can detect iodine.
- Grate a potato


- Place the grated potato in the glass beaker up to 25ml

- Add boiling hot water to make up 100ml


- Take a polyethylene packet (it doesn’t allow any water through) and open the packet

- Mix some copper sulfate CuSO4 crystals and potassium iodide Kl solution in the packet. Neither of these reagents can pass through the packet walls.


- The reaction between CuSO4 and KI yields iodine I2 inside the packet.
- Seal the packet and place in the beaker and wait around 10 to 15 minutes


What were the results?
Iodine forms inside the packet, but the starch solution in the beaker turns blue.
Why did the solution turn blue?
Iodine molecules can squeeze in between the polyethylene molecules and slowly penetrate through the impermeable walls of the packet. While the process is quite slow and only a small amount of I2 molecules can escape, the starch solution is there to detect them, and it turns deep blue.
How did the iodine get out of the packet and into the beaker?
The packet is riddled with micropores, which allow small molecules such as iodine I2 to pass through slowly via a process known as diffusion.
Why does the solution in the beaker turn blue?
The beaker contains a starch solution which is a tasteless, white powder that resembles a flour consistency. It is a polysaccharide consisting of amylose and amylopectin, with the formula (C6H10O5)n. It also acts as an iodine indicator. An indicator is a substance that gives a visible signal like a change in colour to show the presence or absence of a certain chemical compound. Iodine reacts with starch to form a complex, deep blue compound.
The equation of the reaction of iodine and starch is:
2 + (C6H10O5)n → I2•(C6H10O5)n
What did we think of the experiment?
Unfortunately this experiment didn’t work because we couldn’t find one of the solutions, so the experiment was abandoned. However, we learned more about the results online and Aidan would like to try this experiment again with all the solutions in tact.

Subscribe to MEL Chemistry and save up to 3 months free with prepaid plans now!*
Third experiment – Artificial Sea


What was included in the box?
- Calcium silicate
- Chemical seaweed
- Chemical jellyfish
Calcium silicate


What is this experiment about?

Obtain a self-solidifying mixture!
Reagents
Safety
- Put on protective gloves and eyewear


- Conduct the experiment on a the plastic tray
How to set up the experiment? What do you need?
- Prepare two cups: one with sodium silicate solution (also known as liquid glass), and one with calcium hydroxide solution


- Stir for 30 seconds


- At first, when the two liquids are mixed, it might look like nothing is happening
- Quickly pour back and forth for 20 seconds


What were the results?

Calcium hydroxide Ca(OH)2 reacts with sodium silicate Na2Si2O3 and this provides the insoluble calcium silicate CaO*SiO3. This is why the solution hardens right in the air.
Calcium silicate is a popular material for modern day industry, for example it is used for passive fire protection and in some type of cement.
What did we think of the experiment?
Aidan was fascinated by the solution hardening in front of his eyes and couldn’t believe how the mixture had transformed. A great experiment to get him thinking about the properties of chemicals and how they can change. Very quick and simple to perform.
Subscribe to MEL Chemistry and save up to 3 months free with prepaid plans now!*
Chemical seaweed


What is this experiment about?
Grow chemical seaweed in a beaker!
Reagents
Safety
- Put on protective gloves and eyewear
- Conduct the experiment on the tray
How to set up the experiment? What do you need?
- Prepare a potassium hexacyanoferrate(II) K4[Fe(CN)6] solution
- 100ml water in the glass beaker

- Place 2 big spoons of K4[Fe(CN)6] in the beaker


- Stir until everything dissolves


- Pour various metal compounds (called metal salts) into different areas of the beaker.


- For one minute, drop CuSo4 in some places and ZnSo4 in other places in the beaker
- Now, wait for 20 – 30 minutes and do not shake!
- Add 5 to 10 drops of the FeCl3 in different places too

What were the results?


The metal salts gradually dissolved and reacted with the potassium hexacyanoferrate (ii), forming insoluble copper and zinc compounds. These don’t just precipitate out, but rather form ‘bubbles’ due to osmotic pressure. The elegant chemical seaweed grows from these bubbles.
The science behind the experiment
The reaction between a metal salt and K4[Fe(CN)6] results in the formation of a film made of an insoluble substance on the surface of the crystal. The film lets water molecules pass through, but salt stops salt ions. This kind of film is called a semipermeable membrane, while the process by which water passes through such a film is called osmosis.
The water molecules are initially outside of the membrane while the salt particles are inside. The water molecules gradually permeate the membrane, which causes the pressure inside to increase. This is called osmotic pressure.
Due to osmotic pressure, the film around the crystals stretches and eventually breaks. The K4[Fe(CN)6] solution on the outside and the metal salt from the inside contact through the newly formed openings and react again. The reactions forms a new membrane and therefore the chemical seaweed grows.
For more information on this science experiment visit here.
What did we think of the experiment?
This was a fascinating experiment. Even I was in awe at seeing how the beaker transformed with seaweed! Amazing experiment for children to create.
Subscribe to MEL Chemistry and save up to 3 months free with prepaid plans now!*
Chemical jellyfish


What is this experiment about?
Drops of solutions turn into amazing jellyfish!
Reagents
Safety
- Put on protective glove and eyewear
- Conduct the experiment on the tray
How to set up the experiment? What do you need?

- Pour the sodium silicate (liquid glass) solution into the Petri dish

- Now apply the solutions of metal compounds (called metal salts) to the surface of the sodium silicate solution.


- Apply 4-5 drops of each solution drop by drop from various heights


What were the results?

An ion-exchange reaction occurs between the sodium silicate and the metal salts. As a result, insoluble metal silicates form. These resemble jellyfish!
The water will gradually evaporate and leave behind a multicoloured layer of insolute silicates.
To keep the jellyfish, leave to dry completely (2-3 weeks)
The science behind the experiment
If you take two substances and split them up into parts called ions, then mix them in solutions, these parts might form new substances. If even one of these new substances precipitates out or flies away as a gas, the substances enter into an ion-exchange reaction.
In this experiment, sodium silicate Na2SiO3 enters into an ion exchange reaction with various salts, such as CuSO4. Separately, both of these substances exist in the form of the following ions in a solution: Na+, SiO32-, Cu2+and SO42-. But if we mix the solutions, the copper ions Cu2+ and silicate ions SiO32- form insoluble copper silicates CuSiO3↓. Due to the viscosity of the liquid glass, these take the form of chemical jellyfish.
What did we think of the experiment?
Another fascinating experiment that Aidan loved working on. We left the jellyfish out for a day and then decided we were done with the experiment, but we could definitely see jellyfish forming which was inspiring.
Subscribe to MEL Chemistry and save up to 3 months free with prepaid plans now!*
First impressions of MEL Chemistry kit and experiments
Our first impressions were the sheer volume of items you get for your £29.90 monthly fee. There’s so much to keep you occupied and what you learn is invaluable. I’ve learned just from watching Aidan conduct these experiments with his dad. It’s a fantastic piece of STEM kit for kids of all ages, as you don’t get make-believe stuff, you get the real thing and kids are conducting real experiments.
Were the experiments easy to navigate and understand for our nine year old?
Aidan wanted to get stuck in straight away so we had to teach him to slow down and read through the instructions first. However, once he got into the swing of things, as well as navigating the app which isn’t so easy to use on the first go, we knew what we had to do and we just got on with it. Everything is easily labelled, the instructions are simple to read through and the after-learning experience such as the live lessons and the VR app is invaluable.
Did our son learn anything from the experiments?
It’s really important to encourage your child to learn and understand the experiments they’ve conducted and MEL Science offers that through live lessons from real-life scientists and the VR app. The detail is fascinating and even parents will learn a lot too. Aidan learned so much about chemical changes and he was very proud to tell people he’d made seaweed and jellyfish. Young learners can learn so much about the way the world works from these amazing science kits
What are the pros of using the MEL Chemistry Kits?
There’s so much to be positive about with these MEL Chemistry kits. The Starter Kit for one is impressively stocked for each experiment you get every month, so you don’t have to worry too much about not having the right tools for the experiment. The only items you need around the house are things you’d likely have anyway. The experiments are packed full of everything you need, in easy to read labels and simple straightforward instructions.
The experiments are fascinating. You’re not just learning how to dye milk, you’re creating jellyfish, seaweed and a tin hedgehog!
The biggest thing for me is it made Aidan feel like a little scientist and it has given him the ambition to continue on this path which is amazing. He even told me he wants to have a science channel which is music to my ears because all he wanted to do was gaming before then.
What are the cons of using MEL Chemistry Kits?
The kits are for older kids but I would say Aidan navigated through everything well as a nine-year-old. As thorough as the kits are I did find navigating through the website and the mobile app difficult and I had to help him on a few occasions. You can access the content online without a subscription but it’s a learning curve, finding out where you need to look.
I’m glad MEL Science has come up with MEL Kids to capture younger children into the fascinating world of science early on. We will be reviewing the MEL Kids subscription very shortly so please watch this space!
What would the MEL Chemistry kits be useful for?
The MEL Chemistry kits would be useful for older children who share an interest already in science or who need a hobby to get them off the screens. My older one is ten and wasn’t too interested in joining in with his brother. However, once he saw his brother creating fascinating results with the experiments he now wants to get involved.
If you’re struggling to find something to occupy your older kids, then get them these fun science kits. You may have to encourage them to start but once they do, they will be hooked.
Is MEL Chemistry / MEL Science worth it?
MEL Chemistry injects kids with passion and wonder and it’s easy to see why with the level of thought involved in each kit. Kids are kids and they need to find hobbies to get them off the screens. I think the MEL Chemistry kit is a great bonding experience for parent and child and it gets you both talking afterwards about the results afterwards.
£29.90 a month to get my kids off the screens? It’s definitely worth it! Or you can save three months and go for the 12-month prepaid plan and then a kit will pop through your letterbox every month. You don’t have to worry about what to do because this great science kit has everything you need.
Well worth the value I believe, especially with the quality of items you receive every month.
Subscribe to MEL Chemistry and save up to 3 months free with prepaid plans now!*
What is my overall opinion of the MEL Chemistry Subscription kits?
A fantastic and very educational piece of kit for kids to enjoy and learn at the same time. The science experiments are fun, informative and detailed so kids learn the true science behind each experiment as the chemicals change in front of their eyes.
Ease of use
A few of the items in the starter kit were difficult to get to grips with. For example, we couldn’t place the phone vertically on the stand which was frustrating for Aidan so we ended up not using it.
The other issue was the app itself. As we were provided with the kits for review, I hadn’t subscribed the conventional way online so I wasn’t able to access some of the features in the subscription, like more information on the kits and the webinars.
I spoke with customer service via live chat and they helpfully showed me where I could access the information I needed without the need for an email address and, although difficult to get to, I ended up thinking this was a useful addition to the service. Extra information on the experiments and other content is accessible whether you have a subscription or not, which was good for us.
Fits the purpose
The MEL Chemistry kits are designed to open your child’s eyes to the wonders of chemistry and that is exactly what it did for my son. He has always had a scientific brain and has been interested in why things are the way they are. But, my eldest, who had zero interest, was left amazed at how some of the experiments turned out the way they did.
Educational – Benefits of MEL Science Chemistry Experiments
The MEL Chemistry kits are very educational – the supplementary literature you get with the experiments will tell you exactly why they work in the way they do and how the chemical reactions are formed. Plus, there is a proportional link to higher scores in science once conducting these experiments so it’s a full star rating from me.
Suitable for children
The MEL Science kits are suitable for older children from ten years plus but my nine-year-old was absolutely fine conducting the experiments. If you have younger children the MEL Kids would be more suitable for your child. I will be publishing a review on MEL Kids very soon, so watch this space!
Value for money
You get a lot for your money and the Starter Kit alone covers you for a lot of the experiments. Plus you only need minimal items from the house which are very easy to source, so for an all in one piece of kit, it’s definitely worth the money.
MEL Chemistry Box Review – Did my son enjoy the science experiments? Children’s enjoyment rating
Aidan absolutely loved the MEL Chemistry kits, so much so he wants to start a YouTube science channel, so the experiments have definitely sparked his interest in science. He was eager to try them all and he wants to keep going so it’s safe to say his enjoyment rating is on full!
| Overall rating | |
| Ease of use | |
| Fits the purpose | |
| Educational | |
| Suitable for children | |
| Value for money | |
| Children’s enjoyment rating | |
Subscribe to MEL Chemistry and save up to 3 months free with prepaid plans now!*
MEL Science FAQs
What’s the appropriate age for the MEL Chemistry sets?
MEL Science advertises their chemistry sets for children 10 years and older so the most appropriate age is from 10 to 14 years old.
How often are the experiment sets shipped?
You’ll get 2-3 experiments once a month. The number of experiment sets you get depends on your subscription plan.
When does MEL Science charge for each shipment?
MEL Science will charge you about 5-10 days before the shipment arrives. There is no fixed date at the moment.
Do you need to pay for shipping?
No. The shipping cost is included in the subscription’s price.
How many times can I repeat the experiments?
The subscription includes enough reagents to perform each experiment twice
What can I do if something is missing or broken?
Contact MEL Science’s customer support +18559712330 if you’re in the US or +44203 695 1721 if you’re in the UK. You can also email support@melscience.com or use their online live chat service.
Where can I find protective gloves?
All MEL Chemistry sets requiring gloves include two pairs of safety gloves in two different sizes, so a parent can do the experiment together with their child
Why are there two pairs of protective gloves and goggles?
The smaller pair is for the young chemist, the larger pair is for the parent.
Can I adjust the length of the earpieces of the protective googles?
Yes, you push the circular part of the earpiece into the straight part to make the earpiece shorter. Pull the circular part of the earpiece out of the straight part to make the earpiece longer.
Do we always have enough items to do the experiment in the kit?
You may need additional items for the experiments like USB AAA rechargeable batteries or milk. You can find most of what you need at home. A list of items is on the reverse side of the outer packaging of the chemistry set or in the email regarding the shipment which MEL Science send 5-10 days before its arrival.
I’ve performed the experiments, now what?
Get online, sign up for the live webinar classes and learn more about the science experiments you completed. There is a wealth of information on MEL Science’s website here*.
Subscribe to MEL Chemistry and save up to 3 months free with prepaid plans now!*
Why is water transparent?
Electrons in water act in a similar way to visible light so they don’t absorb or reflect most of the light. … Instead they allow it to pass through relatively unimpeded, absorbing wavelengths like infrared and reflecting invisible UV.
Taken from howitworksdaily.com
What is polyurethane melting point?
Melting temperature is 250 degrees celsius
What is something you can’t melt?
You can’t melt dry ice at normal atmospheric pressure. It undergoes sublimation, turning directly from solid to gas. Wood or paper doesn’t melt too, considering normal pressure conditions.
Calculate the ph of a solution prepared by mixing 2ml of a strong acid solution PH 3 and 3ml of a strong base of PH 10
You can find the answer here: https://qr.ae/pGHRqk
Why is the mixture of methanol and water homogeneous?
You can find the answer here: https://qr.ae/pGHRqS
How do I convert propanoic acid to butanoic acid?
You can find the answer here: https://brainly.in/question/14340643
Why are some polymers amorphous and others semi-crystalline?
You can find the answer here: https://blog.impactplastics.co/blog/the-difference-between-amorphous-semi-crystalline-polymers
Among Argon Sulphur chlorine which is more electronegative?
Here is a table tgaken from creative-chemistry.org.uk:
Electronegativity
The table shows electronegativity values for the elements Na to Ar.
| Element | Symbol | Atomic number | Electronegativity |
|---|---|---|---|
| sodium | Na | 11 | 0.93 |
| magnesium | Mg | 12 | 1.31 |
| aluminium | Al | 13 | 1.61 |
| silicon | Si | 14 | 1.90 |
| phosphorus | P | 15 | 2.19 |
| sulfur | S | 16 | 2.58 |
| chlorine | Cl | 17 | 3.16 |
| argon | Ar | 18 | — |
What is the molarity of 10 HCl?
You can find the answer here: https://qr.ae/pGHR38
How can I calculate the pH of carbonic acid its concentration is 0 05 and molar and Ka 0 00007?
You can find the answer here: https://qr.ae/pGHR3H
What is the reaction between H2SO4 H2o?
Sulfuric acid (H2SO4) reacts very vigorously with water in a highly exothermic reaction. If you add water to concentrated sulfuric acid, it can boil and spit and you may get a nasty acid burn.
Take from thoughtco.com
What is the major difference between chemistry and physics?
Physics also deals with the basic principles that explain matter as substance and energy and may study aspects of atomic matter by following concepts derived from the most fundamental principles. Chemistry focuses on how substances interact with each other and with energy (for example heat and light).
Taken from en.wikipedia.org
If you begin with 8 0 grams of hydrogen and 10 0 gram oxygen what is the limiting reactant?
You can find the answer here: https://qr.ae/pGHREp
What results from two atoms colliding?
You can find the answer here: https://qr.ae/pGHREZ
What are some examples of empirical formulas?
For example, the empirical formula of a hydrocarbon is CH 2 and its M r is 42.
the mass of the atoms in the empirical formula is 14.
42 ÷ 14 = 3.
so you need to multiply the numbers in the empirical formula by 3.
Taken from BBC Bitesize
How do you prove that chlorine and hydrogen are diatomic molecules?
You can find the answer here: https://qr.ae/pGHRdF
Are hydro flasks or thermos endothermic or exothermic? Why?
You can find the answer here: https://qr.ae/pGHpG2
Are atoms and elements considered to be matter?
All matter is made up of substances called elements, which have specific chemical and physical properties and cannot be broken down into other substances through ordinary chemical reactions. Gold, for instance, is an element, and so is carbon. There are 118 elements, but only 92 occur naturally.
Taken from www.khanacademy.org
How does iodine react with water?
Iodine reacts with water to produce hypoiolite, OI–. The pH of the solution determines the position of the equilibrium. Iodine is not reactive towards with oxygen or nitrogen. However, iodine does react with ozone, O3 to form the unstable yellow I4O9.
Taken from dirkncl.github.bio
Which chemical in liquid form can melt the human body?
You can find the answer here: https://qr.ae/pGHpto
Can an MRI detect pencil graphite?
You can find the answer here: https://qr.ae/pGHpt3
*MEL Science gifted us the MEL Science Chemistry set and MEL science experiments as part of a 100% honest Mel Science review. All thoughts and opinions are our own
*Links marked with a ‘*’ are affiliate links which means I may earn a small commission on qualifying purchases
*Photos by Tomas Preston photography